
First time setup
Safety Warning
Don't wear the shocker somewhere near your neck or your heart. Check out Safety for more information.
Safety Warning
Do not touch the pins of the shocker with both hands at the same time. The electricity could flow through your heart.
What you need
- USB cable suitable for your OpenShock hub.
- A stable power source. Try to avoid cheap power bricks — they can cause the device to crash under certain loads.
- A smartphone with a web browser (Chrome, Firefox, etc.)
- Your router's Wi-Fi password.
- OpenShock hub
- Shocker
- OpenShock account
Setup the OpenShock hub
Step 1: Wirelessly connect your phone to the hub
- Plug your hub in and ensure it has power.
- On your phone, search for a Wi-Fi network named similar to
OpenShock-XX:XX:XX:XX:XX:XXand connect to it.
Step 2: Connect to the hub via the network
- A web page should automatically pop up on your phone. If it does, skip to step 3 below.
- If the page does not appear automatically:
- Open your browser and go to
http://4.3.2.1 - If that doesn't work, try
http://10.10.10.10instead
- Open your browser and go to
- In the web interface, find your router's Wi-Fi network.
- Press the green button next to it, enter your Wi-Fi password, and press Submit. A green pop up should appear if it connected successfully.
Step 3: Set the RF TX Pin (if needed)
RF TX Pin
DO NOT change the RF TX Pin UNLESS IT IS NOT AUTOMATICALLY DETECTED or you are using a
DIY hub. This is an advanced feature. It should be set correctly by default after flashing the
OpenShock firmware if you are using a known board. If the pin is not automatically selected, you
can open a Serial terminal and send the command rftxpin # where # is your pin number. If you
do not know how to do this, you can also re-enable the captive portal (hotspot of the Hub) to
re-configure it. For more information see the page dedicated to your micro-controller under
boards.
Step 4: Create a hub on the website
- On your PC open openshock.app.
- Create an account (if you don't have one already).
- Navigate to Hubs.
- Click the green plus icon at the lower right corner to create a new hub.
- Give it a name:
- Open the context menu of the hub (the three dots next to the newly created hub).
- Select edit.
- Type in a name (your name, for example) into the name field.
- Press save.
Step 5: Pair the hub
- Open the context menu of your hub again.
- Select pair and press get pair code — this will generate a new pair code.
- On your phone, type the code into the account linking field of the hub's web interface, then press pair. After you link the hub to your account, it should shut down its own Wi-Fi network.
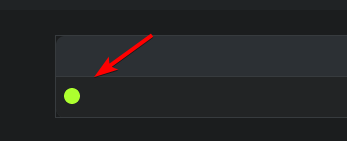
Step 6: The hub is now connected!
If everything went well, it should show a green icon next to the device name on the website.
Pairing shockers
Step 1: Prerequisites
- Ensure the shocker is sufficiently charged.
- Ensure your hub is connected to the website. (Setup the OpenShock hub)
Step 2: Create a Shocker
- Go to openshock.app.
- Log in if you are not already.
- Navigate to Shockers.
- Press the green plus icon at the bottom right corner.
- Select the hub you created earlier.
- Give your new shocker a name.
- Select the model of shocker.
- Click Create.
Step 3: Pair your Shocker
- Grab your shocker and turn it on (press the power button once — it should beep once).
- Hold the power button again until it beeps and the LED flashes fast. This means pair mode is active.
- On the website, click the speaker icon of your shocker. If your shocker beeps in response, the pairing was successful.
- You must click the icon before the shocker's pairing mode times out (while the shocker's LED is flashing quickly).
Everything should work now, have fun! 🎉
Need Help?
If you need additional help, join our Discord.
Your shocker will remember the hub — there is no need to pair it every time.
Last updated on